If you’ve ever gotten the “Your disk is almost full” notification right before trying to install an update or download a file, you know how annoying it is. The good news: Windows 11 has more built-in cleanup tools than most people realize, and you almost never need to install a third-party “PC cleaner” to deal with it.
Here’s a step-by-step way to find what’s actually eating your storage and clear it out safely — without accidentally deleting something you need.
Before You Touch Anything
Back up anything important — photos, documents, project files — before you start deleting. A quick copy to an external drive or cloud storage now saves you a headache later.
1. See What’s Actually Using Your Space
Don’t guess. Let Windows show you.
- Press Windows + I to open Settings.
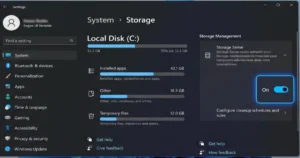
- Go to System → Storage.
- Give it a moment to calculate usage.
You’ll get a breakdown by category — Installed apps, Temporary files, Documents, Pictures, System & reserved, and more. Starting here means you fix the actual problem instead of randomly deleting folders and hoping for the best.
2. Turn On Storage Sense
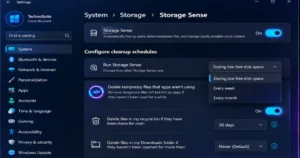
Storage Sense is Windows’ built-in auto-cleanup tool. It clears temporary files and Recycle Bin contents on a schedule you set.
- Settings → System → Storage → Storage Sense
- Turn it on.
- Review the cleanup options before saving.
One thing to watch: if you enable the Downloads-folder cleanup option, Storage Sense can delete files from Downloads that haven’t been opened in a while. That’s fine for some people, risky for others — only turn it on if you’re sure you won’t lose something you meant to keep.
3. Clear Out Temporary Files
Settings → System → Storage → Temporary files shows you categories of files that are generally safe to remove.
Go through the list before hitting Remove files — most of it is disposable, but if a category is unfamiliar, look it up first rather than deleting blind.
One thing worth knowing: after a Windows upgrade, your previous installation sometimes shows up here as a removable system file. Deleting it frees up real space, but it also means you lose the option to roll back to your old version of Windows — so only do this once you’re confident the new install is stable.
4. Check Cleanup Recommendations
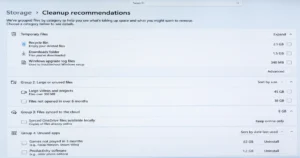
Settings → System → Storage → Cleanup recommendations is Windows proactively flagging stuff worth reviewing: temp files, large files you haven’t touched in a while, files already backed up to the cloud, and apps you’ve stopped using.
It’s a solid shortcut — treat it as a starting list, not a “delete all” button.
5. Uninstall Apps You Don’t Use
Big apps and games are usually the biggest single space-hogs on a PC.
Settings → Apps → Installed apps lets you sort by size, so you can spot the heavy hitters fast.
One caution: don’t uninstall something just because the name doesn’t ring a bell. Some background components are required by Windows or by other software you do use.
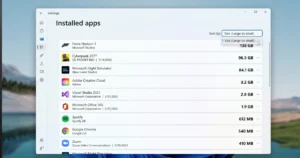
Sorting installed apps by size to spot space-hogs.
6. Move Large Personal Files Off Your Main Drive
Photos, videos, old downloads, and abandoned project files can quietly pile up into hundreds of gigabytes. Check:
- Downloads
- Videos
- Pictures
- Documents
- Desktop
If you want to keep the files but don’t need them handy, move them to an external SSD, a USB drive, or cloud storage. This is one of the simplest fixes and often the one people skip.
7. Empty the Recycle Bin
Deleting a file doesn’t free the space until it’s gone from the Recycle Bin too. Right-click it and choose Empty Recycle Bin — just know that recovery gets much harder once you do.
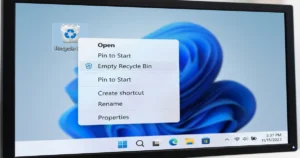
Emptying the Recycle Bin to reclaim space.
8. Review Your Cloud Storage Settings
If you use OneDrive or a similar service, some files might be stored locally on your PC while others are online-only. Storage Sense can manage locally cached cloud files based on your settings — but anything marked Always keep on this device is left alone.
Worth double-checking your settings here before assuming a file is only living in the cloud.
9. Leave System Folders Alone
It’s tempting to go digging through C:\Windows, C:\Program Files, C:\ProgramData, or C:\Users to manually clear space — don’t. A lot of what’s in there is essential to Windows or to apps you rely on, and it’s easy to break something without realizing it. Stick to the built-in Storage, Storage Sense, and Cleanup recommendations tools instead.
10. Still Almost Full After All This?
Go back to the Storage page and see which category is still the biggest offender:
- Apps dominating? Uninstall what you don’t use.
- Videos/Documents/Pictures the culprit? Move them off-drive.
- System & reserved unusually large? Don’t delete manually — look into why before making changes.
Worth noting: low free space can also block Windows updates outright, since updates temporarily need extra room to install.
FAQ
How much free space should I keep on Windows 11?
There’s no universal number, but don’t let your drive sit nearly full — especially if you regularly install apps or updates. A few GB of buffer goes a long way.
Does Storage Sense delete personal files?
Mostly it targets temporary files, but depending on your settings it can also touch the Recycle Bin and Downloads folder — worth reviewing those settings before switching on automatic cleanup.
Can I just delete everything under Temporary files?
Not blindly. Some categories there support recovery or other system functions, so skim the list first.
Why is my C: drive full when I don’t have that many personal files?
Windows itself, installed apps, temp files, reserved storage, and update data can all add up fast — often more than people expect. Settings → System → Storage is the fastest way to see where it’s actually going.
Bottom Line
Figure out what’s using the space before you start deleting anything. Start at Settings → System → Storage, work through Temporary files, Cleanup recommendations, and Installed apps, then handle your personal files. Turn on Storage Sense so this doesn’t pile up again. Windows 11’s built-in tools cover this — you don’t need to install anything extra.
Sources: Microsoft Support — Manage storage space in Windows, Microsoft Support — Free up drive space in Windows
4 thoughts on “How to Free Up Storage Space on Windows 11 (10 Safe Ways That Actually Work)”